
| 일 | 월 | 화 | 수 | 목 | 금 | 토 |
|---|---|---|---|---|---|---|
| 1 | 2 | 3 | ||||
| 4 | 5 | 6 | 7 | 8 | 9 | 10 |
| 11 | 12 | 13 | 14 | 15 | 16 | 17 |
| 18 | 19 | 20 | 21 | 22 | 23 | 24 |
| 25 | 26 | 27 | 28 | 29 | 30 | 31 |
- 미션
- 우아한테크코스
- 백준
- Level2
- Paging
- HTTP
- AOP
- 프리코스
- 우테코
- 트랜잭션
- 스프링부트
- JUnit5
- 세션
- 레벨2
- 프로그래머스
- 자바
- 서블릿
- CircuitBreaker
- yml
- JPA
- MSA
- Spring Batch
- 우아한세미나
- mock
- REDIS
- 의존성
- AWS
- 코드리뷰
- 스프링 부트
- Docker
- Today
- Total
늘
스프링 시큐리티 + _csrf설정 본문
저번에 jwt토큰 방식에 대해서 설명을 드리고 이번에는 스프링의 전통 기반인 session 인증 방식에서 간단하게 적용해 보려고 해요.
이번 포스트는 세션 방식으로 웹페이지 로그인, 회원가입을 구현하면서 느낀 점을 적어보려고 합니다...!
이번 포스트도 이용한 프레임워크는 springboot + gradle + h2 + springsecurity입니다.
package board.configuration;

import board.Service.UserService;
import lombok.RequiredArgsConstructor;
import org.springframework.boot.web.servlet.ServletListenerRegistrationBean;
import org.springframework.context.annotation.Bean;

import org.springframework.context.annotation.Configuration;
import org.springframework.security.config.annotation.authentication.builders.AuthenticationManagerBuilder;
import org.springframework.security.config.annotation.web.builders.HttpSecurity;
import org.springframework.security.config.annotation.web.builders.WebSecurity;
import org.springframework.security.config.annotation.web.configuration.EnableWebSecurity;
import org.springframework.security.config.annotation.web.configuration.WebSecurityConfigurerAdapter;
import org.springframework.security.crypto.bcrypt.BCryptPasswordEncoder;
import org.springframework.security.crypto.password.PasswordEncoder;
import org.springframework.security.web.session.HttpSessionEventPublisher;
import org.thymeleaf.extras.springsecurity5.dialect.SpringSecurityDialect;


@EnableWebSecurity
@RequiredArgsConstructor
@Configuration
public class WebSecurityConfig extends WebSecurityConfigurerAdapter {

    private final UserService userService;

    @Bean public ServletListenerRegistrationBean<HttpSessionEventPublisher> httpSessionEventPublisher() {
        return new ServletListenerRegistrationBean<HttpSessionEventPublisher>(new HttpSessionEventPublisher());
    }

    @Bean
    public PasswordEncoder passwordEncoder(){
        return new BCryptPasswordEncoder();
    }

    @Override
    public void configure(WebSecurity web) throws Exception{
        web.ignoring().antMatchers("/css/**", "/js/**",".img/**", "/lib/**");
    }

    @Override
    protected void configure(HttpSecurity http) throws Exception{

        http
                .authorizeRequests().antMatchers("/api/member", "/","/user/login","/user/new").permitAll()
                .antMatchers("/list","/post", "/all", "/user/info", "/post/{no}", "board/search","/post/edit/{no}").hasRole("USER")           //USER, ADMIN 접근 가능
                .antMatchers("/admin/**").hasRole("ADMIN")     //ADMIN만 접근 가능
                .anyRequest().authenticated()   //나머지 요청들은 권한이 있어야만 접근 가능
                .and()
                    .formLogin()
                    .loginPage("/user/login")    //로그인 페이지
                    .defaultSuccessUrl("/") //로그인 성공 후
                .and()
                    .logout()
                    .logoutSuccessUrl("/")//로그아웃 성공
                    .invalidateHttpSession(true)    //http 세션 초기화
                    .clearAuthentication(true)  //권한 정보 제거
                .and()
                    .sessionManagement()
                    .maximumSessions(1)
                    .expiredUrl("/user/login")
                    .maxSessionsPreventsLogin(true); //동일한 사용자 로그인시 x, false 일 경우 기존사용자 session 종료
                http.exceptionHandling().accessDeniedPage("/user/denied");  //403  예외처리 핸들링
    }

    @Override
    public void configure(AuthenticationManagerBuilder auth) throws Exception{
        auth.userDetailsService(userService).passwordEncoder(passwordEncoder());
    }
}
코드의 주석에도 설명을 달아 두었지만, 부가 설명을 하자면 전체적으로는 jwt config와 비슷합니다. 하지만 csrf를 사용할 것이기 때문에 csrf_disable 하던 설정은 빼줍니다.
controller는 평범하게 구현하고 싶은 방식으로 구현하면 됩니다. 저는 아래처럼 구현했습니다.
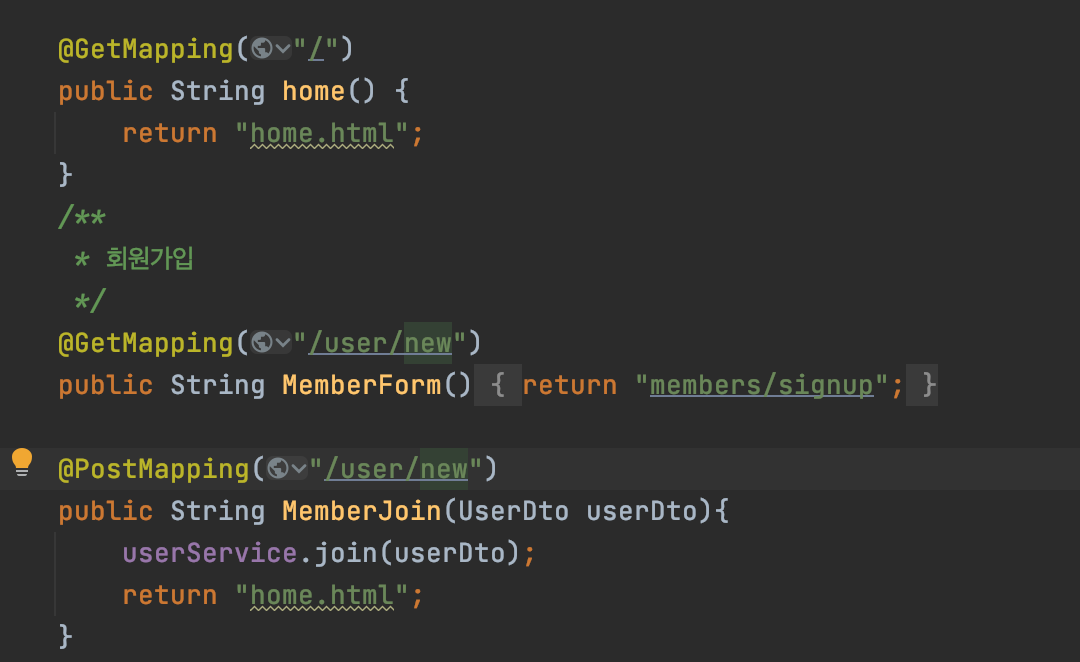
그리고 template 패키지에 thymleaf 문법을 이용하여 작성해주었는데 여기서 _csrf.token을 꼭 꼭 넣어주어야 합니다. 그래야 토큰을 확인할수 있기 때문입니다.
* csrf.token이란
- 서버에 들어온 요청이 실제 서버에서 허용한 요청이 맞는지 확인하기 위한 토큰
<!DOCTYPE HTML>
<html xmlns:th="http://www.thymeleaf.org">

<body>
<div class="container">
    <form role="form" action="/user/new"  method="POST">
        <div class="form-group">
            <label th:for="email">이메일</label>
            <input type="hidden" th:name = "${_csrf.parameterName}" th:value="${_csrf.token}" />
            <input type="text" id = "email" name="email" class="form-control" placeholder="이메일을 입력하세요">
        </div>
        <div class="form-group">
            <label th:for = "password"> 비밀번호</label>
            <input type="hidden" th:name = "${_csrf.parameterName}" th:value="${_csrf.token}" />
            <input type="text" id="password" name="password" class="form-control" placeholder="비밀번호를 입력하세요">
        </div>
        <button type="submit" class="btn btn-primary">Submit</button>
    </form>
    <br/>
</div> <!-- /container -->
</body>
</html>
jwt방식에서는 disable 하여 이용하지 않았지만 세션 방식에서 _csrf.token을 hidden으로 입력하지 않으면,
org.springframework.web.HttpRequestMethodNotSupportedException: 에러와 함께 post 어쩌고저쩌고 뜹니다.
처음에 post방식을 입력 안 했는가 하고 한참을 봐도 안 보였는데 _csrf.token 위에 줄을 까먹었었던 거였어요!!
신기하지 않나요? _csrf라는 이름은 처음봤거든요, 보통 외부 라이브러리 함수?변수들은 주로 getName(), setName() 등 이름앞에 '_' <- 요게 있는것도 신기하고 함수호출하는데 () 도 안붙이는것도 신기하고 이해가 안가서 ctrl+클릭하면 들어가지나 하고 혹시나 해봤는데?
public interface CsrfToken extends Serializable {

	/**
	 * Gets the HTTP header that the CSRF is populated on the response and can be placed
	 * on requests instead of the parameter. Cannot be null.
	 *
	 * @return the HTTP header that the CSRF is populated on the response and can be
	 * placed on requests instead of the parameter
	 */
	String getHeaderName();

	/**
	 * Gets the HTTP parameter name that should contain the token. Cannot be null.
	 * @return the HTTP parameter name that should contain the token.
	 */
	String getParameterName();

	/**
	 * Gets the token value. Cannot be null.
	 * @return the token value
	 */
	String getToken();

}
실제 내장? 안으로 들어오게 되더라고요! 우선 예상대로 함수이름예는 ()붙어있는게 맞았어요! 그런데 실제 사용할때, 위에 코드처럼 '${_csrf.parameterName()}' 이렇게 ()를 붙이면 작동이 안되더라고요,,, 모든 블로그를 봐도 안나왔었는데 역시 공.식.문.서

Serializable을 상속하는데 요건 직렬화로 메모리의 객체 데이터를 바이트 형태로 변환하는 것으로 알고있습니다.
즉, 메모리를 디스크에 저장하거나 네트워크 통신에 사용하기 위한 형식으로 변환하는 것을 말한다고 합니다.
이걸 봐선 csrf토큰뿐만 아니라 다른 네트워크 통신이 필요한 코드에는 앞으로 Serializable을 상속해서 사용해야 할것 같네용. (직렬화 자료들이 많아서 나중에 모아서 정리해봐야 할것 같습니다)
이제 위에서 구현한 후, 요렇게 하면

요렇게 회원가입을 하고 로그인을 하면~

로그인에 성공을 하고 게시판을 이용할 수도 있습니다. 연습하기 위한 틀이라서 꾸밈보다는 기능에만 중점을 두었습니다..ㅎㅎ
다음에 더욱 도움될 깨알 정보들을 더 가져오겠습니다.....!!!
*공부하는 중이라 계속 수정될 수 있습니다..! 아래는 제 깃 링크인데 계속 수정할 수 있으니 참고하시면 됩니다.
github.com/Gyuchool/Spring_Board
Gyuchool/Spring_Board
Contribute to Gyuchool/Spring_Board development by creating an account on GitHub.
github.com
Reference
Tutorial: Using Thymeleaf
1 Introducing Thymeleaf 1.1 What is Thymeleaf? Thymeleaf is a modern server-side Java template engine for both web and standalone environments, capable of processing HTML, XML, JavaScript, CSS and even plain text. The main goal of Thymeleaf is to provide a
www.thymeleaf.org
'백앤드 개발일지 > 스프링부트' 카테고리의 다른 글
| [JPA] 양방향 매핑 OneToOne Lazy 이슈 (0) | 2021.07.19 |
|---|---|
| 스프링 프레임워크 (0) | 2021.07.02 |
| JPA, Hibernate, Spring Data JPA (0) | 2021.06.27 |
| [Spring Security] Jwt Token & Session + refreshToken (0) | 2021.03.13 |
| 상속 논리 모델 -> DB 물리 모델링 (0) | 2021.03.10 |

